
Usar certificados digitais para melhorar a segurança dos sistemas e aplicações é algo muito comum. Nesse post irei demonstrar como configurar uma CA Microsoft que pode ser utilizado na criação de certificados digitais que poderão ser usados por sites, sistemas e aplicações.
Configurando uma CA Microsoft
Nesta primeira parte, iremos criar uma CA baseada no Microsoft Windows. No lab estamos usando a versão 2019 no Windows Server, mas o conceito e serviços utilizados durante a instalação da feature de CA são bem parecidos com as demais versões desde o Windows Server 2012.
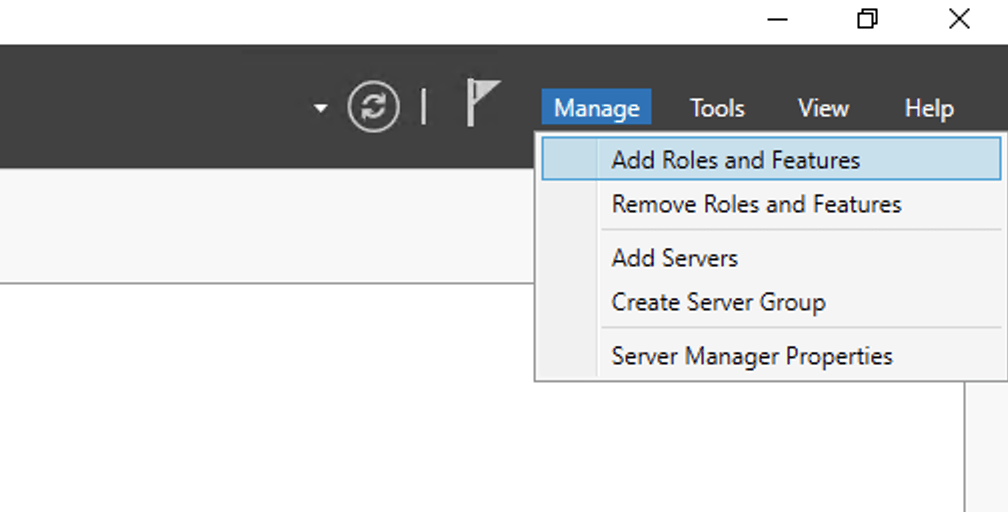
1. Abra o Server Manager e clique em Manage e em seguida Add Roles and Features:
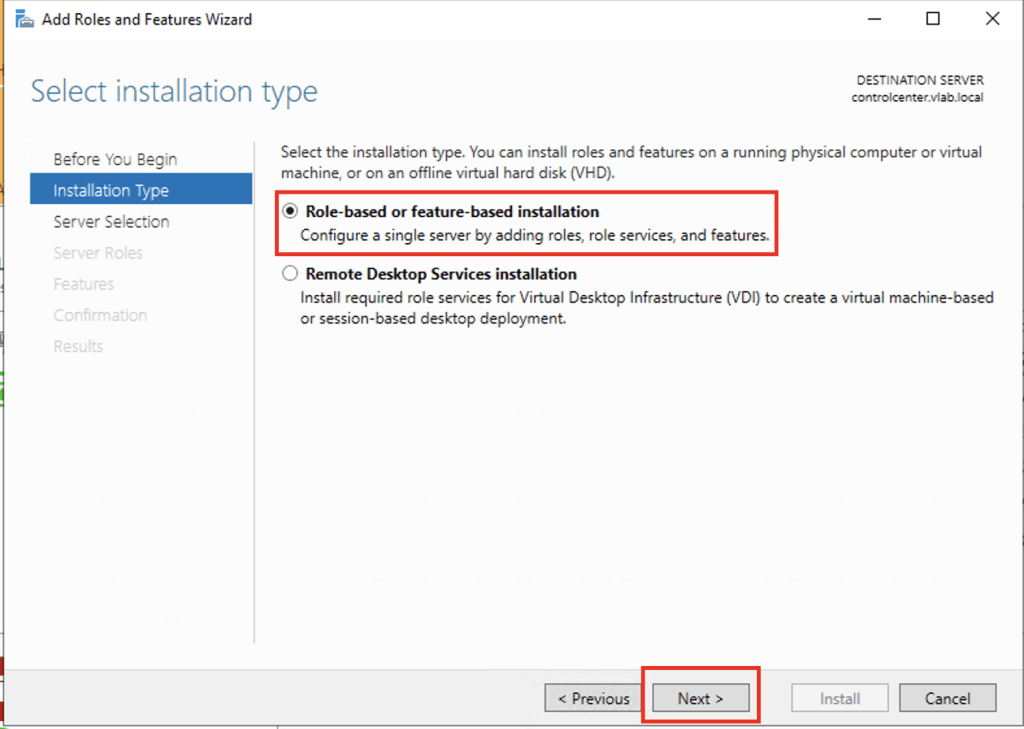
2. Na tela Before you begin, clique em Next. Na tela Select installation type, selecione Role-based or feature-based installation e em seguida clique em Next.
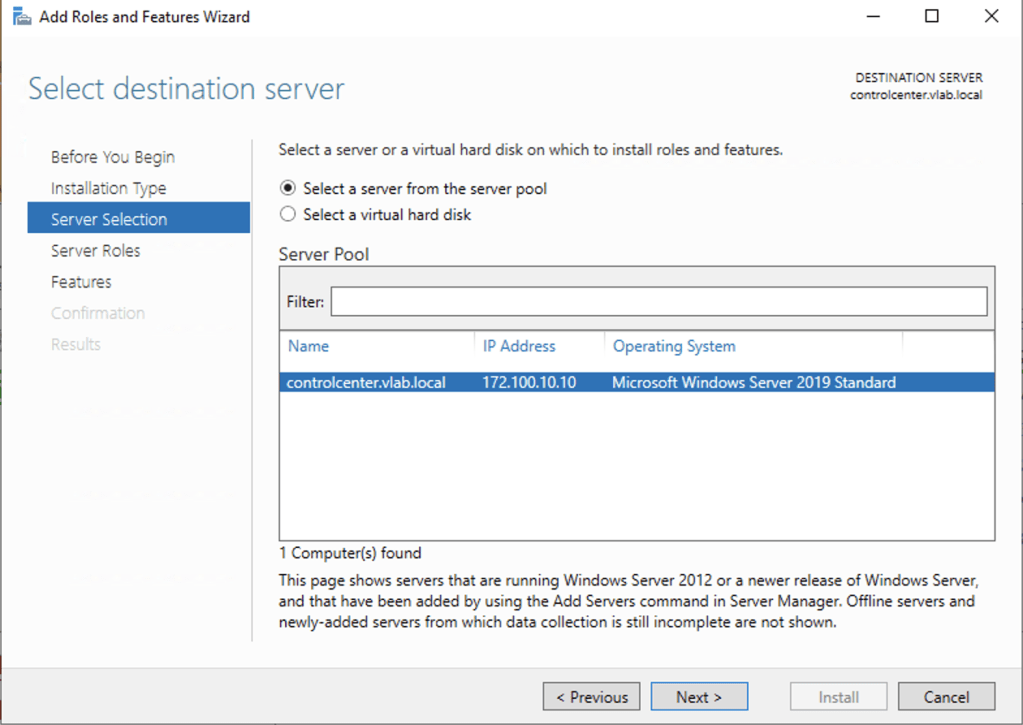
3. Selecione a opção Select a server from the server pool e em seguida clique em Next.
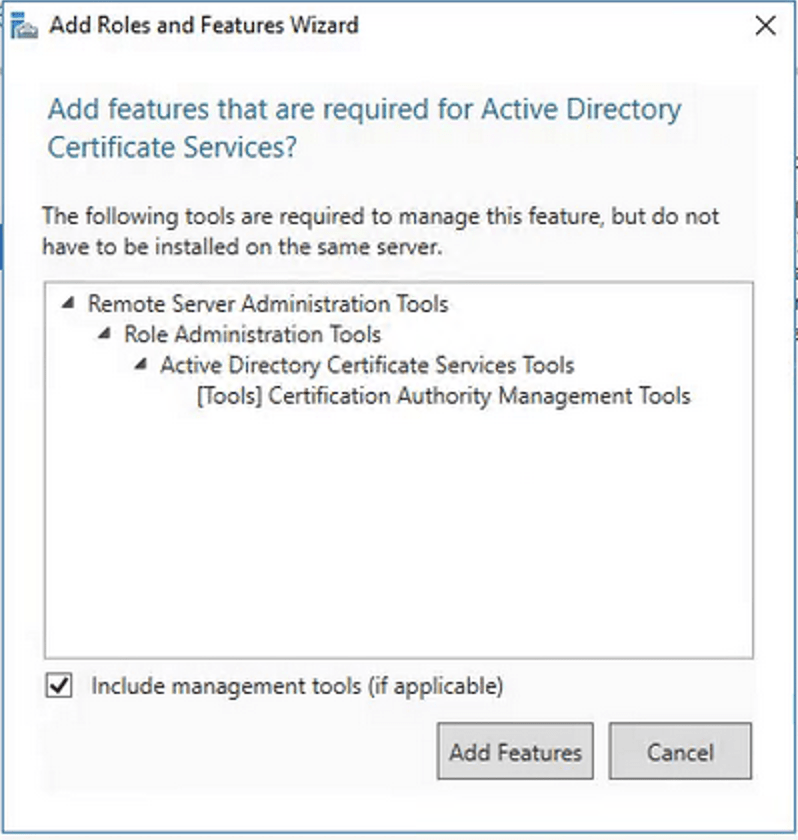
4. Em Select server roles expanda a role Active Directory Certificate Services e selecione as opções Certification Authority e Certification Authority Web Enrollment.

No pop-up que será exibido, selecione a opção Include management tools (if applicable) e clique em Add Features.
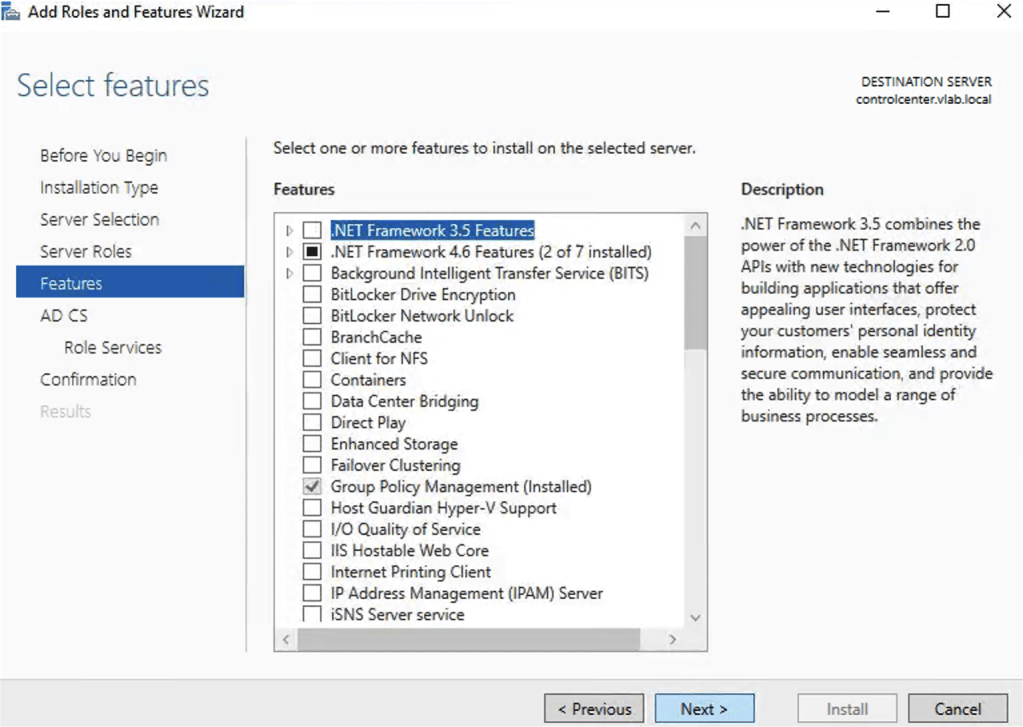
5. Em Select features, clique em Next sem fazer qualquer alteração.
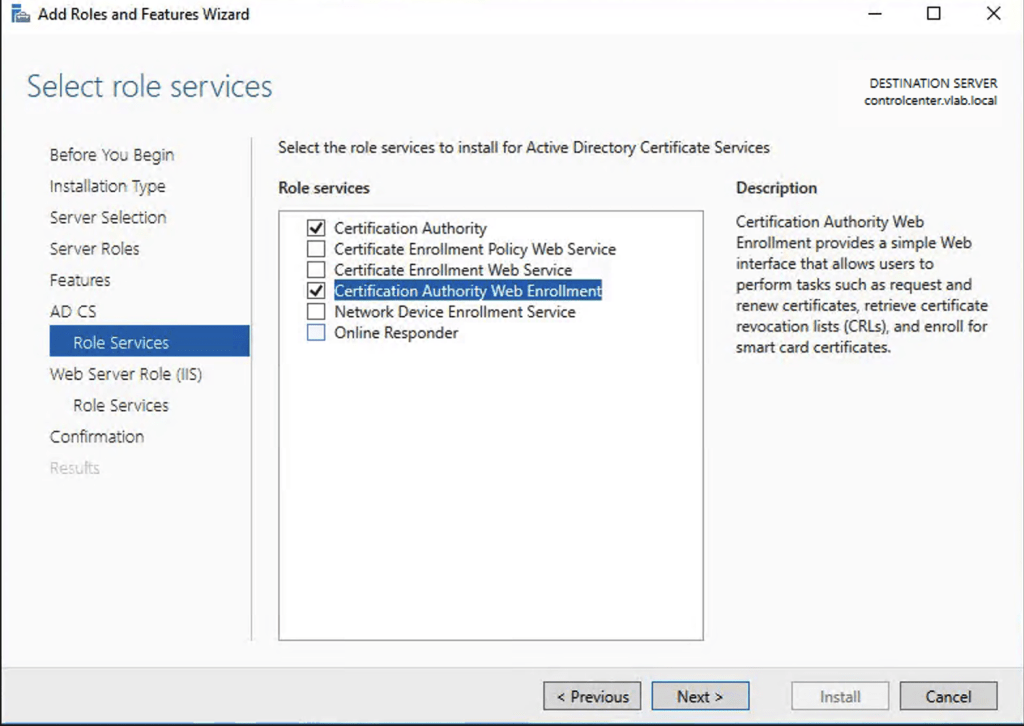
6. Em AD CS, Role Services selecione Certification Authority e Certification Authority Web Enrollment.
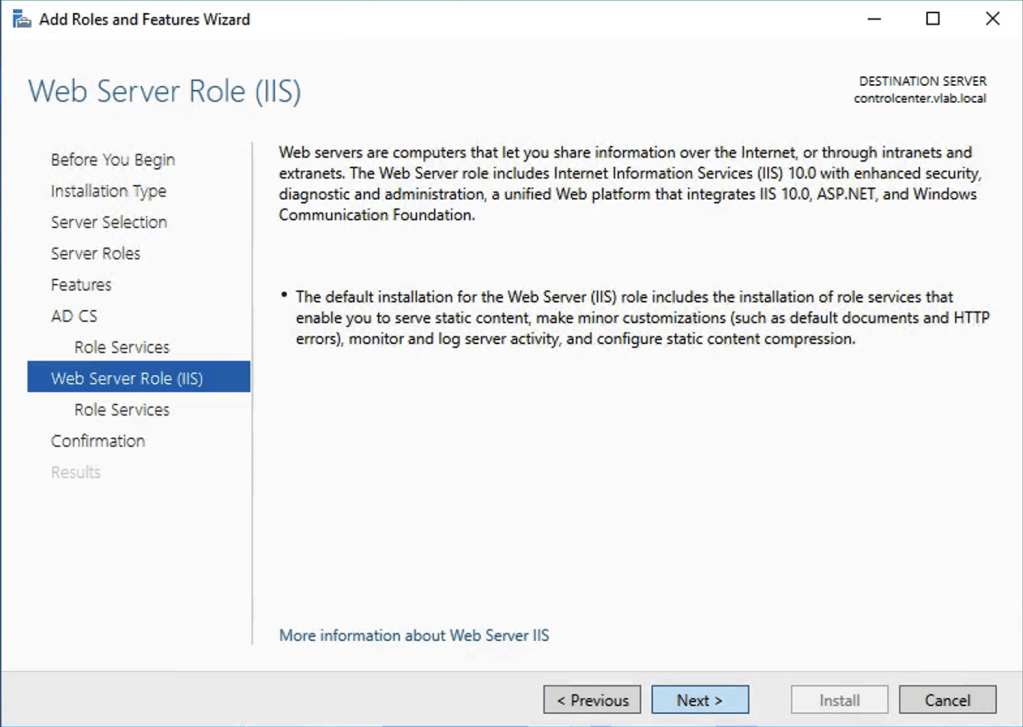
7. Em Web Server Role (IIS) clique em Next.
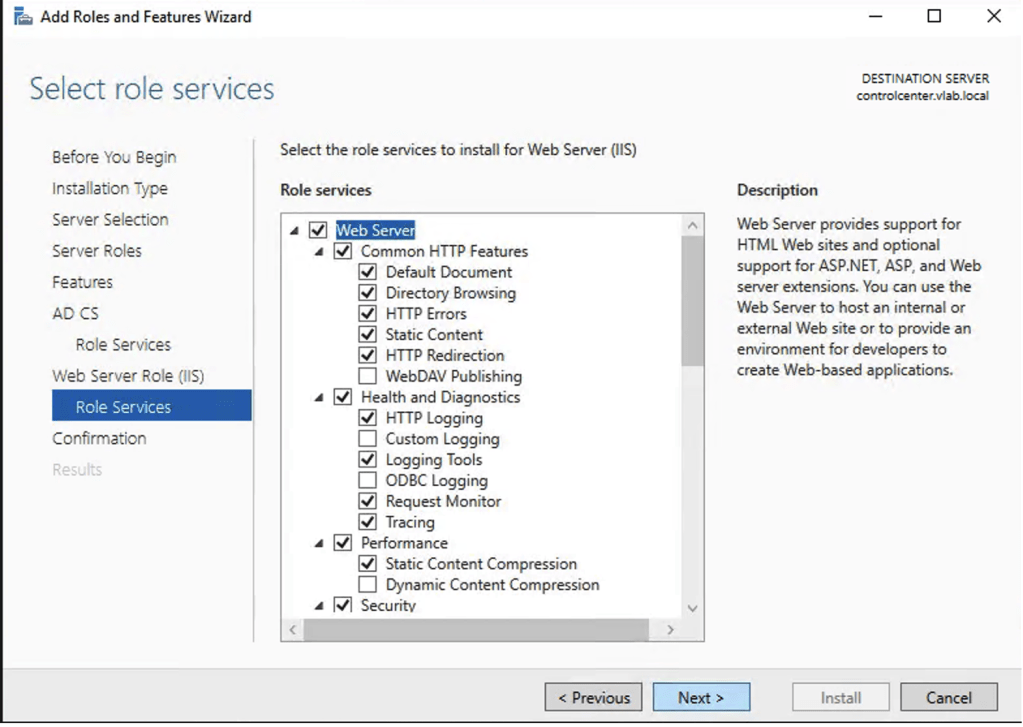
8. Em Web Server Role (IIS) selecione os serviços conforme demonstrado na imagem.
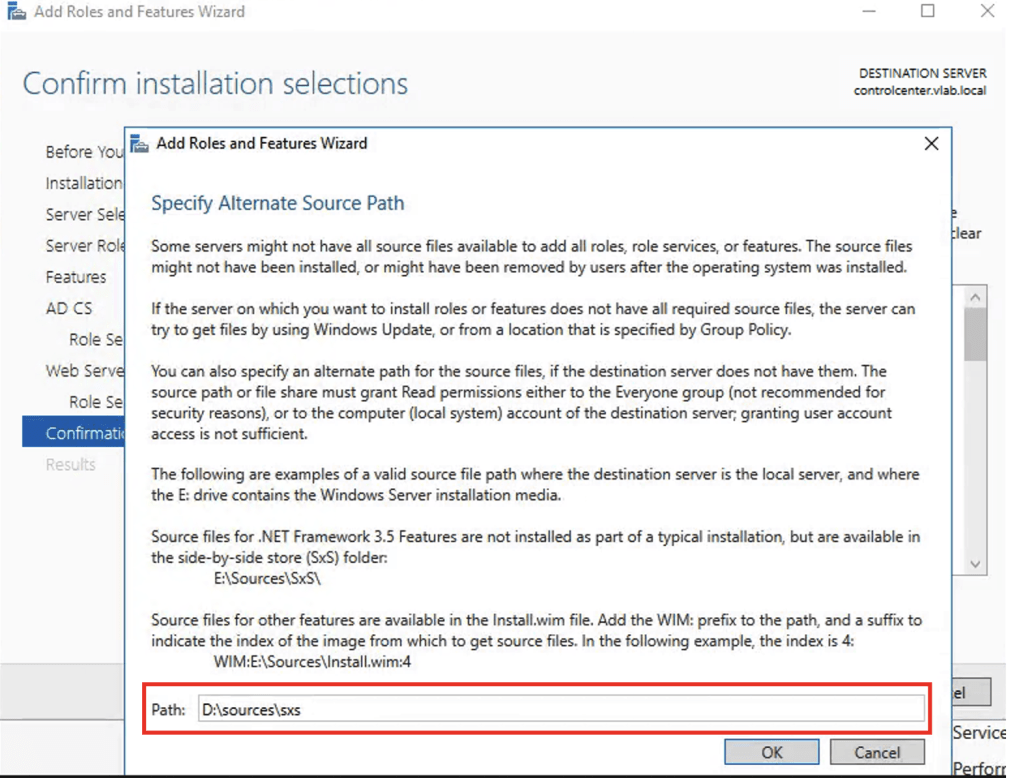
9. Na maioria dos casos é preciso especificar o caminho onde estão os instaladores das features selecionadas, visto que durante a instalação do Windows, essas imagens são deixadas de lado para que haja uma economia de espaço no disco de instalação. Desta forma, tenha certeza de que o disco do sistema operacional está disponível e configure o Alternate Source Path para o caminho correto.
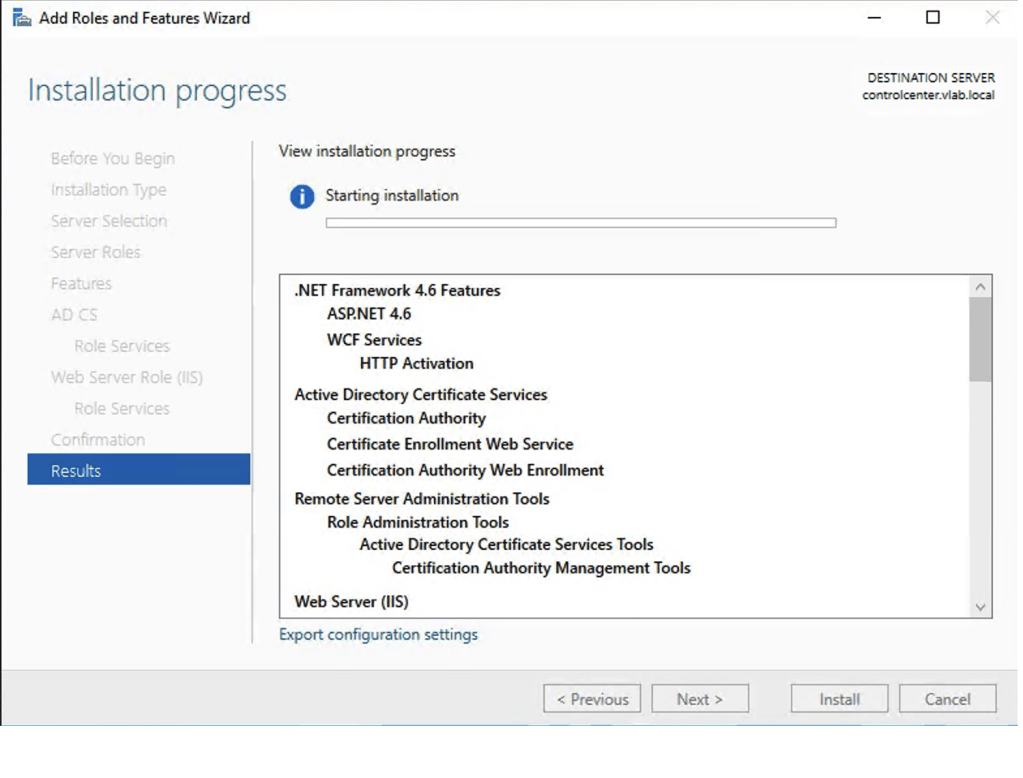
10. Aguarde o fim da instalação dos serviços e features selecionados.
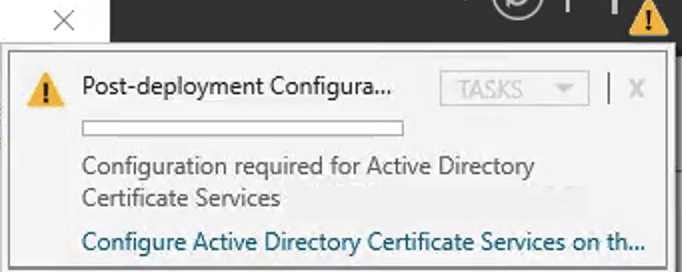
11. Após a instalação das features, iremos efetuar as configurações necessárias para utilização do Microsoft CA. Clique em Configure Active Directory Certificate Service on th…
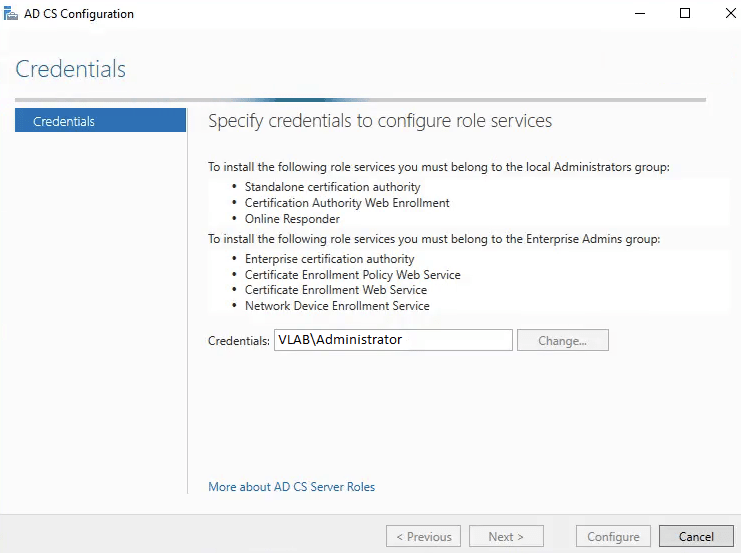
12. Na primeira tela de configurações do AD CS, selecione as credenciais que serão usadas para configuração dos serviços e clique em Next.
13. Em Select Role Services to configure selecione Certification Authority e Certification Authority Web Enrollment.

14. Em Specify the setup type of the CA selecione Enterprise CA.

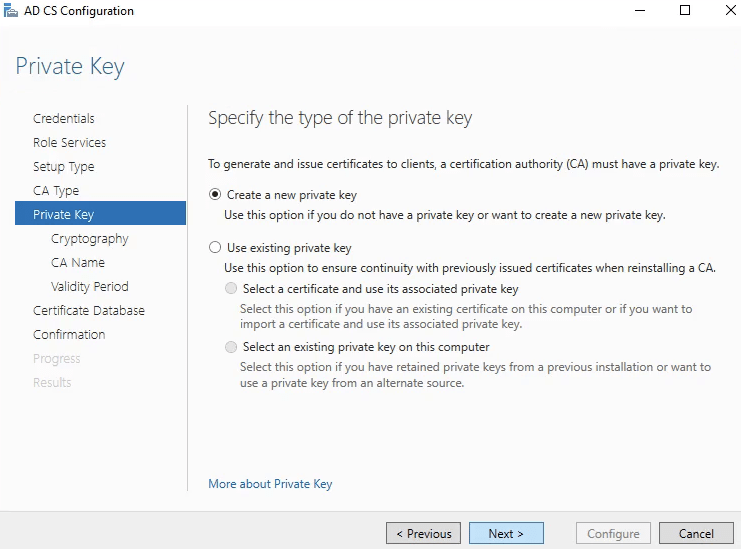
15. Em Specify the type of the private key selecione Create a new private key.
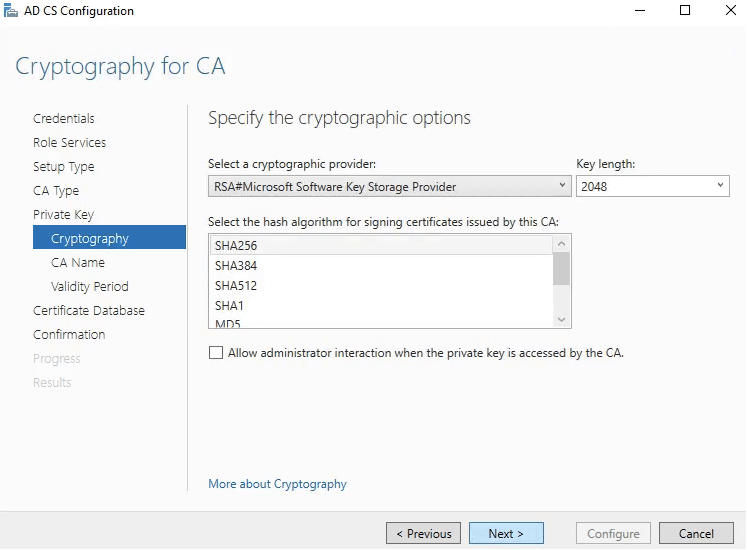
16. Em Cryptography for CA selecione Specify the cryptographic options. RSA com uma chave de tamanho 2048 e algoritmo SHA256 é o mais recomendado e o que é mais comum atualmente.
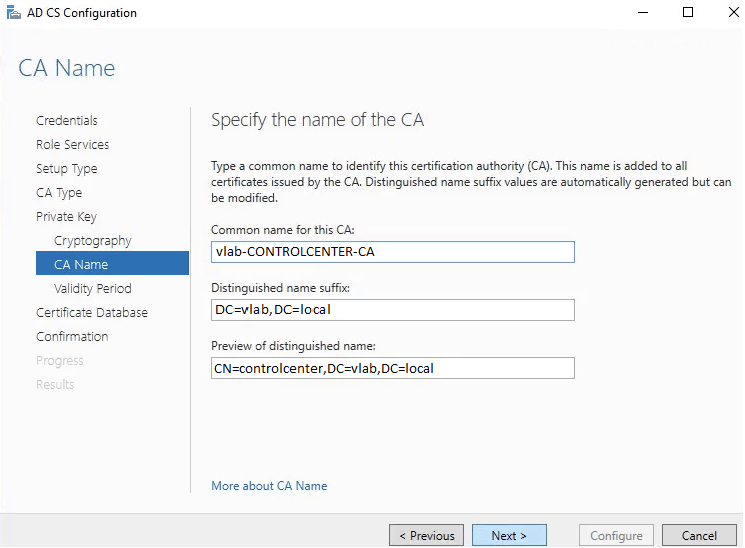
17. Em Specify the name of the CA clique em Next.
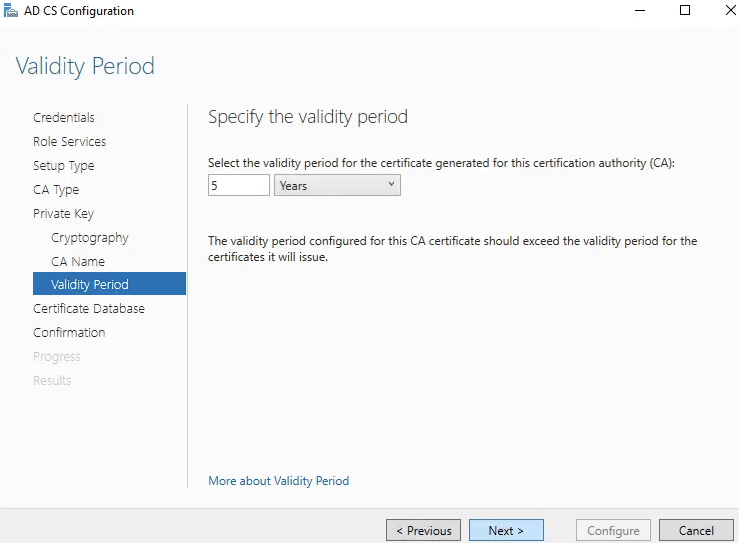
18. Em Validity Period selecione a validade do certificado da CA (root certificate). É importante ressaltar que nenhum certificado gerado pela CA pode ter uma data de expiração maio que a data de expiração do certificado da CA.
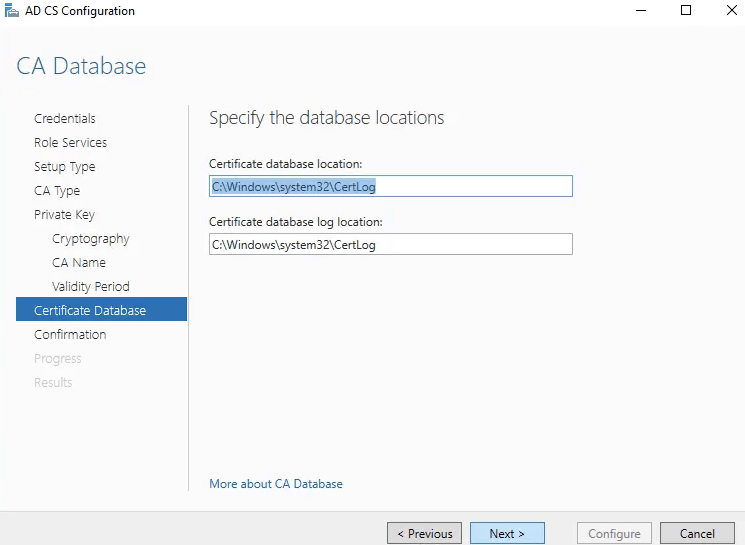
19. Em CA Database informe os caminhos onde deverão ser armazenados os dados da CA.
20. Na tela de confirmação, valide que todas as configurações estão de acordo com as especificadas e por fim clique em Configure.
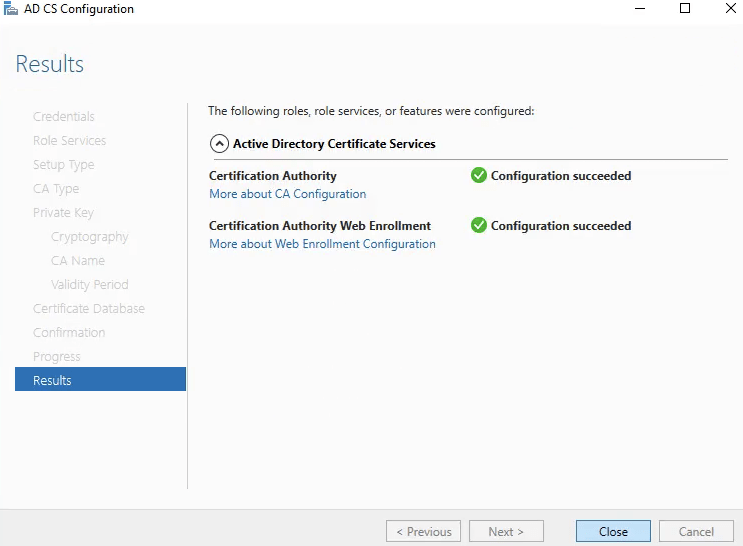
21. Uma vez que as configurações forem concluídas, a CA já está pronta para ser usada. Clique em Close.
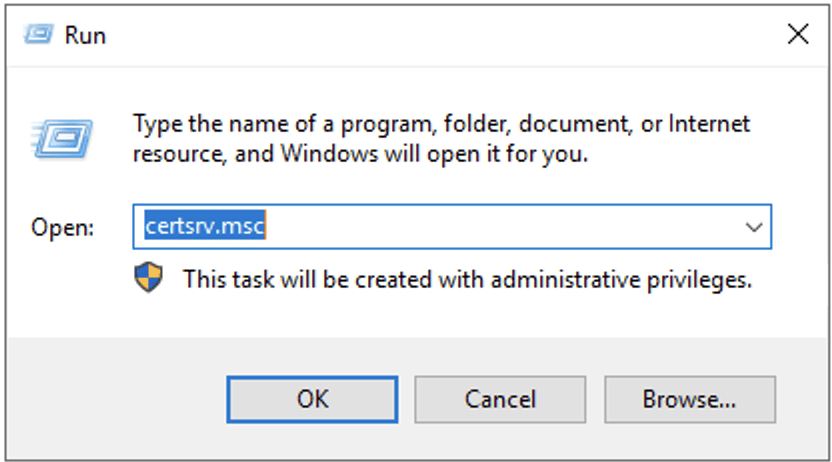
22. Você pode acessar a console da CA para validar que tudo está funcionando conforme o esperado. Abra o menu Executar e digite certsrv.msc.
23. A console deverá abrir conforme demonstrado abaixo.

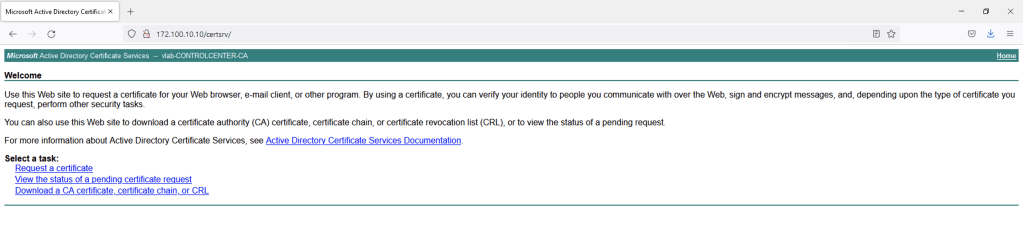
24. Você também pode acessar a URL de solicitação de certificados para validar que tudo foi devidamente configurado através da URL: http://<CA-IP>/certsrv/.
E é isso aí pessoal! Espero que este post seja útil para vocês. Lembrando que esse CA pode ser usado para gerar certificado para diversas soluções, sistemas e produtos.
Clique aqui para ler em Português
Using digital certificates to improve the security of systems and applications is very common. In this post I will demonstrate how to configure a Microsoft CA that can be used to create custom digital certs to be used by websites, systems and applications.
Configuring a Microsoft CA
In this first part we going to create a Microsoft CA. We are using Microsoft Windows Server 2019 to demonstrate this steps, but the concepts and service used during the installation of this feature are very similar with the other MS Windows Servers since 2012 version.
1. Open the Server Manager and click in Manage then Add Roles and Features:
2. On the Before you begin screen, click Next. On the Select installation type screen, select Role-based or feature-based installation and then click Next.
3. Select Select a server from the server pool option and then click Next.
4. On Select server roles expand the role Active Directory Certificate Services and select the options Certification Authority and Certification Authority Web Enrollment.
In the popup that will be displayed, select the option Include management tools (if applicable) and click Add Features.
5. In Select features, click Next without any change.
6. In AD CS, Role Services select Certification Authority and Certification Authority Web Enrollment.
7. In Web Server Role (IIS) click Next.
8. In Web Server Role (IIS) select all options as shown below.
9. In most cases it is necessary to specify the path where the installers of the selected features are, since during the installation of Windows, these images are left aside to save space on the installation disk. So, make sure the operating system disk is available and set the Alternate Source Path to the correct path.
10. Wait the end of the installation.
11. After features installation, we have to configure Microsoft AD CS. Click in Configure Active Directory Certificate Service on th…
12. On the first configuration screen, select the credentials that will be used to configure AD CS services, then click Next.
13. In Select Role Services to configure select Certification Authority and Certification Authority Web Enrollment.
14. In Specify the setup type of the CA select Enterprise CA.
15. In Specify the type of the private key select Create a new private key.
16. In Cryptography for CA select Specify the cryptographic options. RSA with key length 2048 and an algorithm SHA256 is the most recommended and common one today.
17. In Specify the name of the CA click Next.
18. In Validity Period select the validity of the CA certificate (root certificate). It is important to note that no certificate issued by the CA can have an expiration date greater than the expiration date of the CA’s certificate.
19. In CA Database inform the path where they should be stored.
20. On the confirmation scree, confirm that all settings are in accordance with the specified ones and finally click Configure.
21. Once the settings are complete, the CA is ready to use. Click Close.
22. You can access the CA console to validate that everything is working as expected. open the Run menu type certsrv.msc.
23. The console should open as shown below
24. You can also access the certificate request URL to validate that everything has been properly configured via the URL: http://<CA-IP>/certsrv/.
And that’s it guys! I hope this post is useful for you. Remembering that this same CA can be used to generate certificates for several systems, apps and websites.
